We specialize in iPad 9 screen repairs. We offer both LCD only repair as well as full display replacement for both the LCD panel and the glass panel. Our Glass only repair saves you money by replacing just the damaged component.
How much does Glass repair cost on an iPad 9th Gen?
Glass replacement costs $160 on the iPad 9th Gen 2021 model.
Common Causes for Screen and Digitizer Damage
Screen and digitizer damage in iPads can occur due to a variety of reasons, including:
- Accidental Drops: The leading cause of physical damage to iPads. When the iPad is dropped the screen often cracks and requires replacement.
- Pressure Damage: Incorrectly storing the iPad in bags or under heavy objects can also cause damage. I have also seen iPads that were squeezed too hard develop cracks in the screen.
- Liquid Damage: Spills that seep into the edges, affecting the digitizer’s responsiveness can also be a cause for screen repair. With liquid damage we have to double check that no other components were affected as the logic board is something that can have issues after liquid damage.
Initial Checks and Diagnostics
Upon receiving a damaged iPad for screen repair, our technicians perform thorough diagnostics to assess the extent of the damage. Our free diagnosis includes:
- Visual Inspection: To evaluate the physical state of the glass, LCD, and digitizer.
- Functionality Tests: To check the responsiveness of the touch screen and the condition of the LCD.
- Component Assessment: To determine if the touch ID/home button is salvageable or needs replacement.
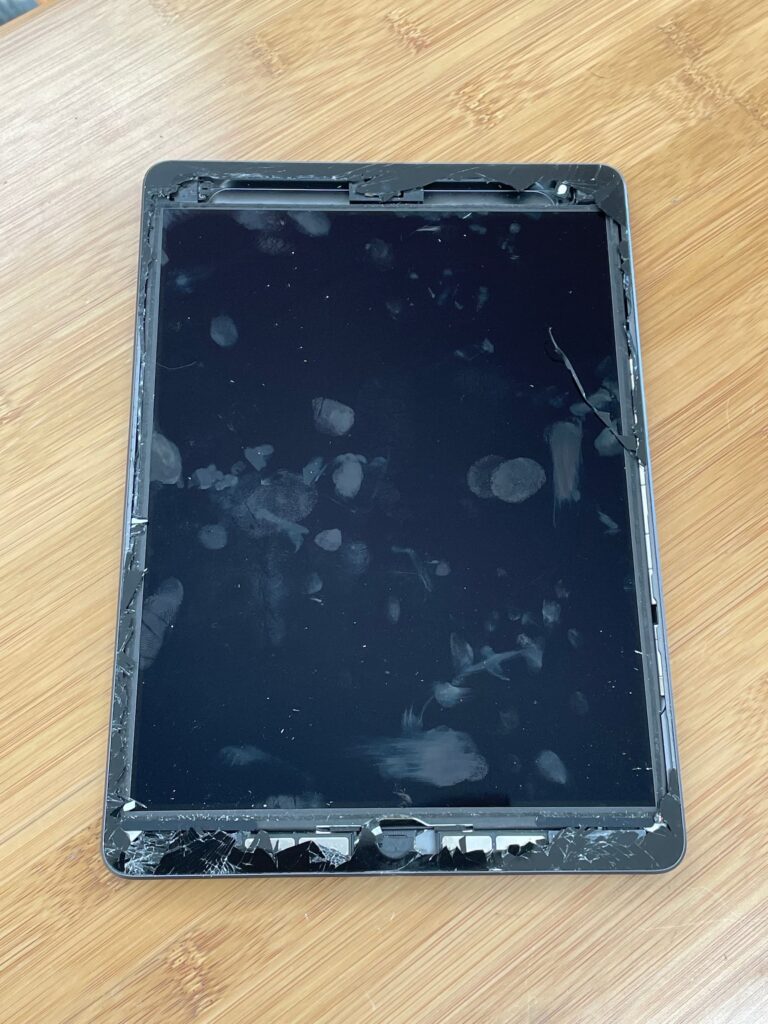
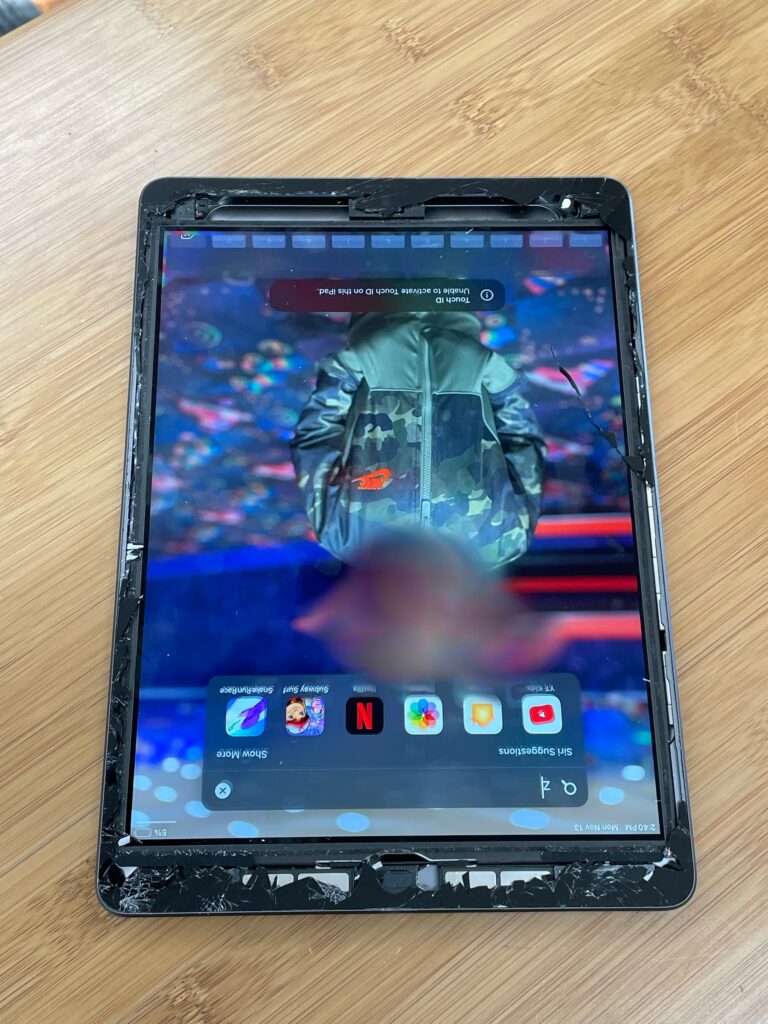
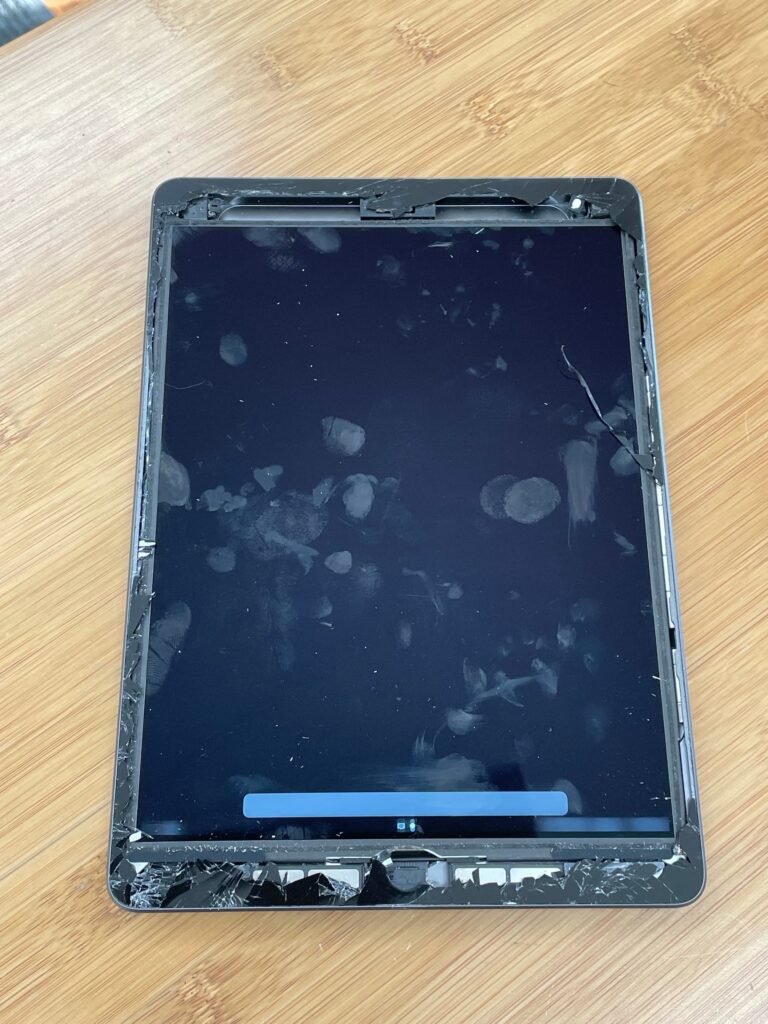
Case Study/Example
A recent case involved a child’s iPad 9th Gen that was brought to us with the glass entirely shattered, the LCD exposed, and the touch ID/home button missing. Our diagnosis concluded that the device required a complete glass digitizer assembly replacement, a new home button, and an LCD cleaning process due to the scratches and smudges present.
Repair Solutions
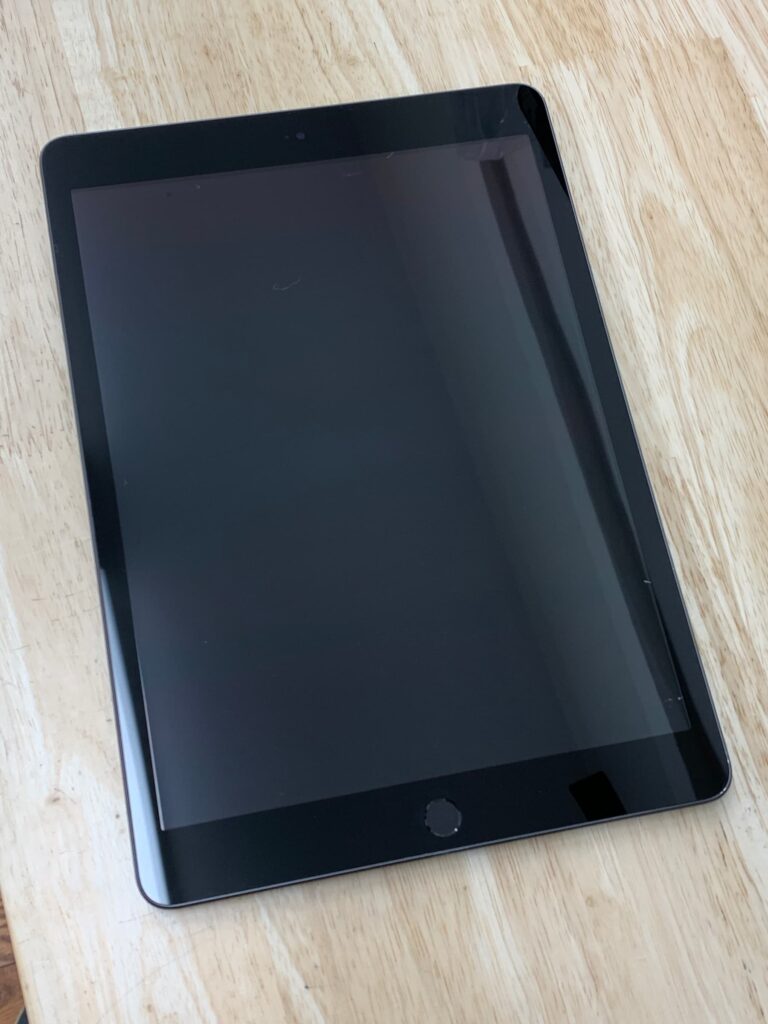
Our repair solution encompassed:
- Complete Glass Digitizer Assembly Replacement: The glass and digitizer are a single panel on this model, so by removing the cracked and broken panel and installing a new one, we were able to restore both the glass and the touch capability.
- Home Button Replacement: We replaced the missing home button on the iPad.
- LCD Cleaning and Restoration: We carefully cleaned the LCD panel to remove the smudges, scratches, and internal glass shards.

Tools Used for iPad Repair
Repairing an iPad, especially when dealing with intricate issues like screen and LCD replacement, requires a specialized set of tools. These tools not only ensure the repair is done efficiently but also help prevent further damage to the device during the process. Here’s an overview of the essential tools used in the repair process of an iPad, particularly for the detailed work involved in our case study:
Heat Plate and Heat Gun
A heat plate or heat gun is crucial for softening the adhesive that holds the iPad’s screen in place. This tool allows technicians to carefully lift the screen without causing damage to the glass or the device itself. It’s essential for opening the device safely and is commonly the first step in many repair processes.
Suction Cups or Screen Removal Tool
Once the adhesive is softened, suction cups or a specialized screen removal tool are used to gently lift the screen from the device’s body. This step must be done with great care to avoid damaging the LCD or the digitizer cables underneath.
Spudgers and Pry Tools
Spudgers and pry tools, often made from plastic or metal, are used to disconnect connectors and remove components without causing static damage or physical harm to sensitive parts of the iPad. They are instrumental in safely navigating the internal layout of the device.
Precision Screwdrivers
iPads are assembled with a variety of screws that require precision screwdrivers to remove. These tools come in different sizes and types (like Phillips or Torx), tailored to the specific screws used in the device. Using the correct screwdriver is crucial to avoid stripping the screws or damaging the device.
Tweezers
High-quality tweezers are used for handling and positioning small components within the iPad. They are particularly useful for managing screws, brackets, and delicate cables that are too small to be manipulated by hand.
Microfiber Cleaning Cloths
After the repair is completed, microfiber cleaning cloths are used to clean the inside of the screen and the outer surfaces of the iPad. These cloths remove dust, fingerprints, and smudges without scratching the device.
Adhesive Strips or Liquid Adhesive
To reassemble the iPad, new adhesive strips or liquid adhesive is applied to ensure the screen is securely attached to the device body. This step is crucial for maintaining the structural integrity of the iPad and ensuring its durability post-repair.
Safety Glasses
Technicians wear safety glasses to protect their eyes from glass shards or any harmful substances that might be released during the repair process. Safety is paramount, not just for the device but for the individuals performing the repairs.
Testing Equipment
After the repair, the iPad is tested with specific equipment to ensure all functionalities are working correctly. This might include multi-meter tools to check for proper power distribution, touch sensitivity testing tools, and display color calibration tools.
Each tool plays a pivotal role in the successful repair of an iPad, ensuring that the device returns to its owner in optimal condition. Skilled technicians, equipped with the right tools and knowledge, can tackle even the most daunting repairs, restoring the iPad to its full functionality and aesthetic appeal.
Pricing
At MackTechs, we believe in transparency and affordability. The repair process for such extensive damage is priced competitively to ensure our clients receive the best service without breaking the bank. Our $160 glass replacement pricing takes into account the cost of high-quality parts and labor.
Preventing screen damage on iPad 9
Screen damage is among the most common issues iPad users face, often leading to costly repairs or replacements. However, with a few proactive measures, you can significantly reduce the risk of screen damage and extend the life of your iPad. Here are some practical tips to keep your iPad’s screen safe and intact:
Use a Protective Case
Invest in a high-quality protective case that offers robust protection for your iPad. Look for cases with a hard outer shell and a shock-absorbent lining to protect against drops and impacts. A case with a raised edge around the screen can provide an extra layer of defense by preventing the screen from making direct contact with surfaces if dropped.
Apply a Screen Protector
Screen protectors are an essential line of defense against scratches.
Be Mindful of Storage
Avoid placing your iPad in a bag or backpack without adequate protection. Heavy items can press against the iPad and potentially crack the screen. Consider using a dedicated tablet compartment or a padded sleeve to isolate and protect your iPad from other items in your bag.
Avoid Exposure to Extreme Conditions
Extreme temperatures and conditions can weaken your iPad’s screen and make it more susceptible to damage. Avoid leaving your iPad in direct sunlight, in a hot car, or in very cold conditions for extended periods. These environments can cause damage to the iPad.
Educate Young Users
If your iPad is frequently used by children, teaching them how to handle it properly can go a long way in preventing accidents. Encourage the use of both hands when carrying the device, and supervise their use when possible, especially for younger children who might not understand the value or fragility of the iPad.
Repairing your iPad 9 Screen Yourself
At MackTechs we are pro right to repair and love the idea of people trying to repair their own devices… but we do see our fair share of repairs that were attempted and caused further damage. We urge caution when considering repairing your device yourself.
While the idea of repairing an iPad screen yourself may seem like a cost-effective solution, it’s important to weigh the potential risks before choosing the DIY route. The process involves several intricate steps and requires a specific set of tools, not to mention a steady hand and a good deal of patience. Here’s what you need to know about DIY iPad screen repair:
Required Tools and Materials
To perform a screen repair, you’ll need a set of specialized tools, including a heat gun or heat plate, suction cups, pry tools, screwdrivers, and adhesive for reassembly. You’ll also need to purchase a high-quality replacement screen, which should come with the digitizer if you’re replacing the front panel.
Risks Involved
- Further Damage: Without the proper tools and experience, there’s a significant risk of causing further damage to your iPad, including the LCD, battery, and internal components.
- Loss of Functionality: There’s a risk that the iPad might not function as intended after a DIY repair, especially if components are not reassembled correctly or if damage occurs to internal circuits.
Time and Cost
- While saving on labor costs might seem appealing, consider the cost of purchasing the correct tools and replacement parts. Additionally, if the repair goes wrong, you may end up paying more for professional repair services to fix the additional damage.
- The time investment is also significant, as you’ll need to carefully disassemble and reassemble your iPad, which can be time-consuming and challenging without prior experience.
iPad 9 Screen Repair Services
We offer our iPad 9 screen repair services locally in Philadelphia at our shop, as well as nationwide through our mail-in service.